Rigging A Boat:
Rigging Dreher Carbon Riggers:
“Rigging” is the term used to describe the determination and subsequent adjustment of the outrigger height, pitch (oar lock face inclination from the vertical), spread or span (distance between the pins in sculling or centerline of the boat to centerline of the pin in sweep rowing), shoe location (horizontal, vertical and angle), oar length and collar location as well as other adjustments such as boat trim and blade angle at the catch and finish position. The rigging objective being to adjust the boat to comfortably fit the rower while maintaining maximum efficiency of the rowing stroke.
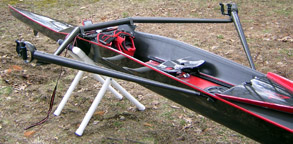
A Single Ready to Rig
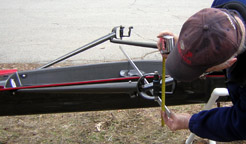
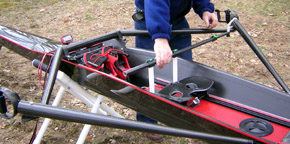

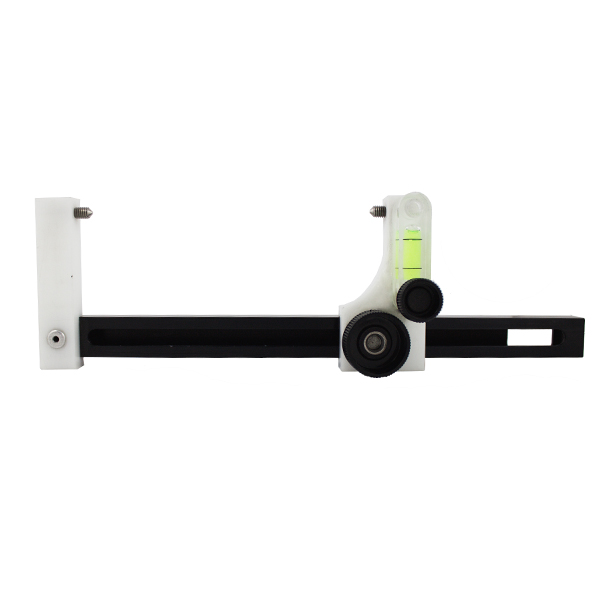
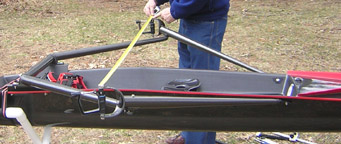
A Special Tool Measures Symmetry & Relative Height of Riggers/Locks
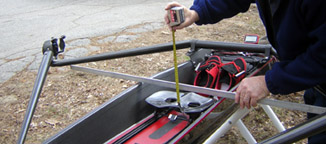
To measure the height, place a straight edge across both gunwales (the upper edge of the side of the boat) and measure up to the lower inside midpoint of the oarlock and down to the lowest part of the seat. This assumes that the plane of the gunwales and seat tracks are parallel side to side. If you have some doubt, check with a level alternately placed across the tracks and the gunwales on the straight edge. If the level shows a difference, you will have to place an accurately parallel riser to support the straight edge above the gunwales because the plane of the tracks are your true point of reference when rowing. Shown in the above picture is a handy tool that helps define the reference plane by registering off the tracks to indicate relative height and symmetry of identical parts of each rigger or lock. When finished adjusting be sure to tighten all the fasteners holding the rigger assembly together firmly.
Pitch: Pitch is the measurement in degrees that the face of the oarlock is inclined from the vertical. Pitch compensates for the flexibility of the oar/rigger system and the imbalance of forces resulting in the blade attempting to dive. The result is that an oar with too little pitch will go deep and be difficult to extract at the end of the stroke. Because the pitch required is dependent on how stiff the system is you must estimate how stiff your equipment is as a starting point. Many years ago when all boats and oars were made of wood we used about 7 – 8 degrees of pitch with some in the oar and some in the lock. In some countries, like Germany, that is still the case. Today with the stiffer composite boats, carbon oars and riggers, the pitch of 4 degrees is molded into the face of the oarlock and the pin that the lock swivels about is set at zero degrees in all directions. If the oar, scull or rigger is constructed correctly, all the extra pitch bushings except for the 4-degree pair that come with modern oarlocks are seldom used. Most oars and sculls are manufactured well within ½ degree of 0 degree pitch, except those built for the German market which uses 3 degrees. Carbon tubular riggers have pins set at 0 degrees with pitch inserts used to decrease the molded in 4 degrees to 2 or 3 degrees. This is because the system is very stiff. On the other hand, a recreational or club single with a wing rigger may use pitch inserts to increase the pitch to 5 or 6 degrees. To determine if you need to correct pitch you must row the boat and observe how the oar tracks through the water. Assuming that you row correctly and have the oar seated against the lock face the oar blade should be buried completely and stay at a constant depth and come out cleanly at the finish. If the result of a test row indicates a pitch adjustment then try different degrees of pitch inserts in pairs and repeat the test to see if it makes a difference.
Pitch Gauge:
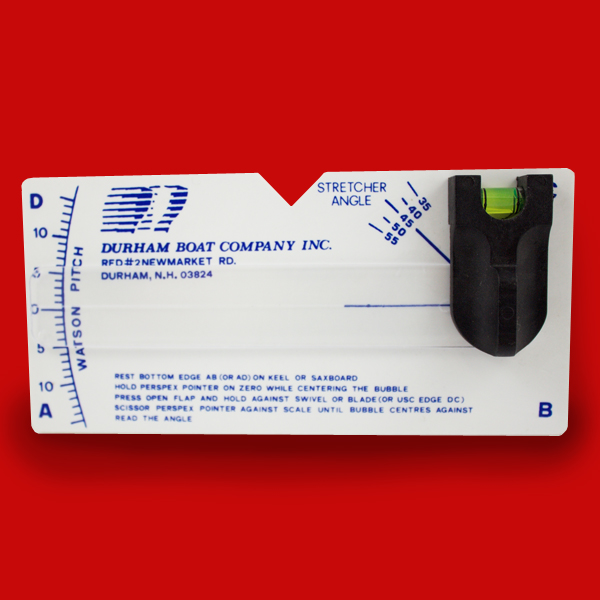
A pitch gauge is used to check if the riggers have been manufactured correctly or if anything has moved. A pitch gauge is a bubble type inclinometer. Many types are available and they all work the same way. With the boat strapped down firmly in stretchers, the movable level of the pitch meter is set to level in the bow to stern direction using either the gunwales or the bottom of the hull near the midpoint.
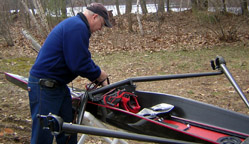
Once the bubble is set to indicate 0 degrees the pitch gauge is then placed 90 degrees across the tracks and the boat adjusted so that you now have a 0 degree reference plain in all directions.
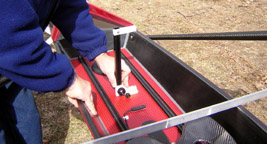
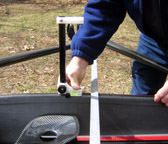
To set the level in the fore/aft direction (i.e., bow to stern) do not use the seat compartment because it may have a built-in incline. Use the gunwale or the bottom of the hull directly under the mid-point of the tracks.
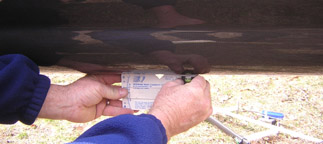
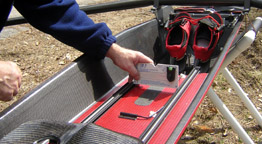
Once this reference plane is established the pitch gauge is moved to the pin, or the back of the lock. If the concentric 4 degree pitch insert set is used (which usually is the case), by rotating the pitch gauge 90 degrees, the pitch can be checked to see if the pin is vertical in all directions, which it should be. There is another type of pitch meter, which relies on conical pins that fit top and bottom into bolts with conical depressions machined into the hex head center. Using this tool, once the boat is leveled, it is extremely easy to set pitch so that the pin is checked for being at 90 degrees in all directions to the reference plane without taking the lock off the pin.
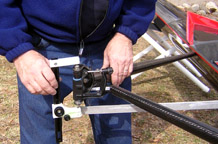
Once it has been determined that the pins are at 90 degrees to the reference plane, or adjusted so, the pitch-bushing pairs can be used to adjust pitch. To do this the lock must be removed from the pin. Select 1 pair of the 4 bushing pairs: 4,4 degree, 5,3 degree, 6,2 degree, and 7,1 degree. The pairs are identified by the indented numbers in the top of the bushing. When inserting the bushing into the lock note that that the bushing must be reversed top and bottom to get the proper angle. After changing bushings be careful to keep the same number of washers over and under the lock as before so that the same height and clearance left over right is maintained.
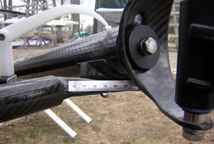
Rigger Spread or Span: Spread is the distance between the centerlines of the lock pins of sculling boats. Span is the distance between the centerline of the boat and the centerline of the pin and sweep boats. For sculling boats the spread ranges between 156 and 163cm, with the most common being 160cm. Sweep boats will range between 81 to 86cm. To assure equal leverage, a measurement from the port side track to the starboard lock and vise versa is made. The actual measurement number is not noted, but must be identical at all positions, both port and starboard so that the boat will pull straight.
Adjusting Dreher Carbon Foot Stretchers:
Footplate and Shoe Location: For scullers the footplate should be located so that at the finish of the stroke the oar handles just graze the rib cage with about a 10 degree lay-back at the catch position. The oars should be at an angle of slightly less than 40 degrees to the boat and the seat in the stern-most position. The legs should be compressed comfortably with some daylight between the calf and back of thigh. The shins should not be beyond vertical toward the stern at the catch position. The foot stretcher is easily positioned to achieve these positions by loosening the 3 wing nuts and moving the foot stretcher along the adjustment plates.
The footplate angle is usually set at 42-43 degrees angled. The angle can be decreased by either moving the keel-only attachment and reading the scale on the older style foot stretcher, or by moving the two bottom bolts attaching the bottom support bar on the newer stretcher. Height on either stretcher is changed by loosening either a single screw in the case of the older stretcher and moving to a new position, or loosening and repositioning a new set of holes for the newer design.
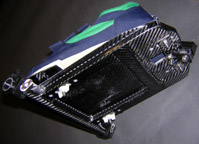
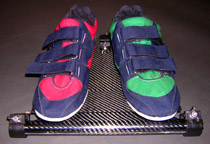
New Reinforced Foot Stretchers with Fixed In-place Shoes
The position of the footplate or “foot stretcher” determines the distribution of the amount of work done before and behind the oarlock pin. The tracks are adjustable by loosening the wing nuts holding the tracks in place under the cockpit. If after you adjust the shoes you bump into either the front or back stops on the tracks, adjust the tracks so that the seat does not stop before full leg compression or extension. The tracks are 81 cm. (31.9″) long and result in a maximum seat travel of 66 cm or 26″.

